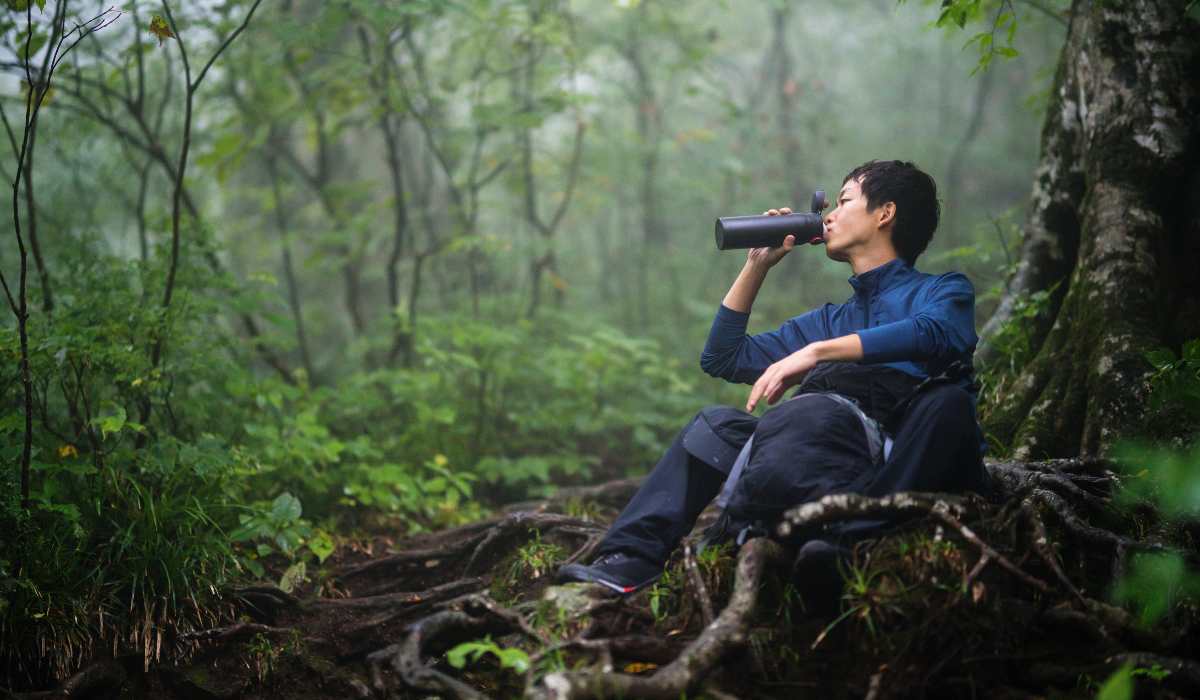
Best Way to Carry Water While Hiking
Discovering the best way to carry water while hiking is essential for any outdoor enthusiast. Proper hydration plays a crucial role in maintaining energy levels, preventing dehydration, and ensuring overall safety during your adventures. In this comprehensive guide, we will explore various aspects of carrying water effectively while traversing through nature’s beauty.
We’ll discuss the benefits of carrying water on hikes and delve into different types of containers suited for various situations. Additionally, you’ll learn how to choose the right container based on factors such as hike duration and available resources.
Furthermore, our expert tips will help you master techniques for storing and filtering water efficiently during your journey. We also provide alternative solutions for those who prefer not to carry large amounts of liquid throughout their entire trip. By understanding the best way to carry water while hiking, you can ensure an enjoyable and safe experience in the great outdoors.
Table of Contents
1. Benefits of Carrying Water While Hiking

Carrying water while hiking is essential for a safe and enjoyable outdoor adventure. Hydration is key for preserving energy, avoiding any problems related to dehydration, and keeping a sense of invigoration while out in the wilderness. In this section, we will explore the various benefits of carrying water during hikes.
Avoid Dehydration
Dehydration can lead to serious health problems such as dizziness, fatigue, confusion, and even heatstroke in extreme cases. Ensure you bring enough water on your trek to maintain hydration and energy levels.
Maintain Energy Levels
Your body needs water to function efficiently and produce energy required for physical activities like hiking. Drinking enough water helps prevent muscle cramps and fatigue so that you can enjoy exploring nature without any discomfort or exhaustion.
Promote Proper Digestion
Water plays a crucial role in digestion by helping break down food in your stomach more easily. This ensures that nutrients are absorbed effectively into your bloodstream which ultimately leads to better overall health during long hikes.
Better Temperature Regulation
- Cooling effect: When you sweat during physical activity like hiking, it’s important to replace lost fluids by drinking plenty of water regularly throughout the day; this not only cools down but also maintains proper body temperature regulation.
- Fighting off cold weather: In colder climates or high-altitude treks where temperatures drop significantly at night time or due to sudden weather changes, staying hydrated is essential to keep your body warm and maintain its core temperature.
Enhance Mental Clarity and Focus
Proper hydration helps improve cognitive function by ensuring that your brain receives an adequate supply of oxygen. This leads to better concentration, decision-making abilities, and overall mental clarity while navigating challenging trails or planning the next steps on your hike.
In summary, carrying water while hiking is a must for every outdoor enthusiast. It not only keeps you healthy but also enhances the overall quality of your adventure in nature’s playground. So grab a bottle or two before hitting the trail.
To ensure a successful and safe hike, selecting an appropriate water container is paramount. Next, we’ll look at different types of containers available for carrying your water when out in nature.
Key Points To Remember:
Carrying water while hiking is essential to avoid dehydration, maintain energy levels, promote proper digestion, regulate body temperature and enhance mental clarity. It helps prevent serious health problems such as dizziness and fatigue while ensuring that your brain receives an adequate supply of oxygen for better concentration and decision-making abilities on challenging trials. Ensure that you bring some hydration with you before embarking on your trek.
Click to read about Best Hot Weather Hiking Skirts
2. Types of Water Containers for Hiking
When selecting the best water container for your hike, it is important to consider the various types of containers available and their associated benefits and drawbacks. Different types of water containers have their own pros and cons, depending on what you require and like. In this section, we will explore some popular options to help you make an informed decision.
Water Bottles
Water bottles are a classic choice among hikers due to their simplicity and durability. They come in different materials such as stainless steel, plastic, or glass – each with unique benefits:
- Stainless Steel: Durable, maintains temperature well but can be heavy.
- Plastic: Lightweight and affordable but may not maintain temperature as well as other materials.
- Glass: Eco-friendly option that doesn’t retain flavors or odors; however, they tend to be heavier and more fragile than other options.
Hydration Bladders/Reservoirs
A popular alternative to traditional water bottles is the use of hydration bladders or reservoirs. These flexible bags hold large volumes of water (usually between 1-4 liters) and fit inside your backpack with a hose that allows easy access while hiking without having to stop and remove your pack. Some advantages include hands-free hydration convenience and even weight distribution within your bag.
Collapsible Water Containers/Bags
If space-saving is a priority, consider using collapsible water containers or bags. These lightweight options can be folded down when empty and easily expanded as needed. Ideal for those seeking to reduce the mass and size of their supplies, these collapsible containers or bags are a great choice.
Water Filter Bottles
For those looking to stay hydrated in areas with limited access to clean water, filter bottles offer a convenient and reliable one-stop solution. Built-in filters in water filter bottles provide hikers with the convenience of safe hydration from natural sources, eliminating the need for additional filtration systems. This eliminates the need for carrying separate filtration systems while still ensuring safe hydration on the go.
When it comes to selecting a water container for hiking, weight, durability, capacity, convenience of use and individual requirements should be taken into account. Consider factors such as weight, durability, capacity, convenience of use, and your specific needs before making a decision.
From collapsible bottles to hydration packs, there are a variety of water containers that can make carrying water while hiking easier and more convenient. Deciding which water container is best for you requires taking into account factors such as size, weight capacity, durability and convenience.
Key Points To Remember:
When it comes to keeping hydrated on a hike, there are various options for water containers such as bottles, bladders/reservoirs, collapsible bags and filter bottles – each with their own pros and cons that should be weighed up in terms of weight, durability, capacity and convenience. Depending on your individual requirements and preferences, each type of water container has its own benefits and drawbacks. Consider factors such as weight, durability, capacity and convenience before making a decision.
3. How to Choose a Water Container for Hiking

Selecting the ideal water container for your hiking trip is critical to ensure you remain hydrated and have an enjoyable time in nature, so let us guide you through the considerations of size, weight, and features. When picking a water container for your hike, take into account aspects such as size, weight and features to ensure you make the right choice. To help you make an informed decision, we’ll provide guidance on the factors to consider when selecting a water container.
Size and Capacity
When selecting a water vessel, the initial factor to take into account is its magnitude and capacity. Aim for a water container that is neither too big nor too heavy to lug around, providing enough hydration for your hike. As a guideline, strive for around 0.5 liters (17 ounces) per hour of moderate activity. For example:
- A short day hike: 1-2 liters (34-68 ounces)
- A full-day hike: 2-4 liters (68-136 ounces)
- An overnight backpacking trip: At least 4 liters (136 ounces), plus extra depending on availability of natural sources along the route
Weight Considerations
The weight of your water container should also be taken into account since carrying heavy gear can quickly become tiring during long hikes. Look for lightweight options such as collapsible bottles or hydration bladders made from durable materials like BPA-free plastic or silicone.
Type of Container: Bottle vs Bladder vs Reservoir System
You have three main types of containers available – bottles, bladders, and reservoir systems with built-in hydration packs:
- Bottles: These are the most common and versatile option, available in various materials like stainless steel, plastic, or glass. They’re easy to clean and refill but can be bulky.
- Bladders: Also known as hydration reservoirs, these flexible bags are lightweight and compact when empty. They fit into a backpack’s designated pocket or clip onto your gear for easy access. However, they may require more maintenance than bottles.
- Reservoir Systems with Hydration Packs: A combination of a bladder and specialized backpack designed for hands-free drinking through an attached hose. This system is perfect for those who want convenience while hiking but comes at a higher price point.
Additional Features
You should also consider any additional features that might enhance your experience on the trail:
- Insulation: Insulated water containers keep your drink cold (or hot) longer – ideal if you’ll be out all day in extreme temperatures.
- Mouthpiece: Some hikers prefer wide-mouth bottles for easier refilling from streams or water fountains; others like narrow-mouth options to minimize spills while drinking on-the-go.
- Durability: Look for sturdy materials that can withstand rough handling without leaking or breaking during your hike.
Taking these factors into account will help you choose the best water container suited to your needs so that you stay hydrated throughout every adventure.
Selecting the appropriate vessel for hydration and safety while trekking is a must. When selecting a water container for your hike, it is essential to take into account several elements like the amount of liquid you need, where you’ll be travelling and which vessel would best fit your requirements.
Key Points To Remember:
When selecting a water container for hiking, consider the size and capacity based on the length of your hike. Look for lightweight options like collapsible bottles or hydration bladders made from durable materials. Choose between bottles, bladders, or reservoir systems with built-in hydration packs depending on your preference and budget. Additional features to consider include insulation, mouthpiece type, and durability.
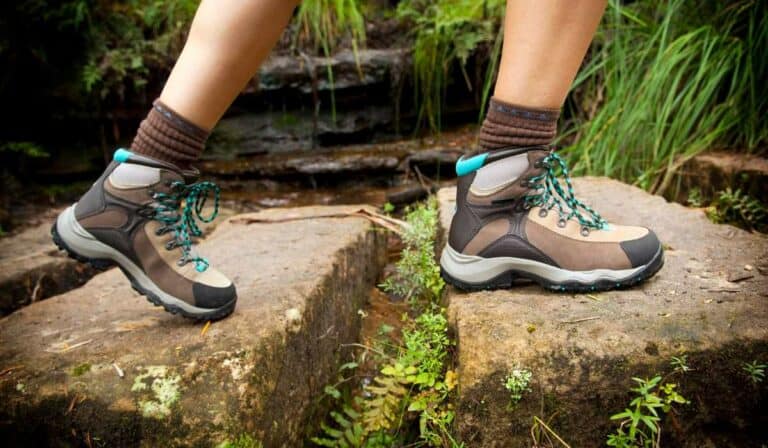
Click to read about Best Shoes for Hiking Sand Dunes
4. Tips on Carrying Water While Hiking
To ensure proper hydration and energy levels while hiking, it is imperative to carry water. In this part, we’ll give you some advice to make carrying water on your hikes simpler and more effective.
A. Choose the Right Container
Selecting the appropriate water container can significantly impact how comfortable and convenient it is to carry water while hiking. Consider factors such as weight, size, insulation properties, and durability when choosing a container that suits your needs.
B. Distribute Weight Evenly in Your Backpack
To avoid discomfort or strain from uneven weight distribution in your backpack, place heavier items like water containers close to your back’s center of gravity (near the middle) between the shoulder blades or hips level depending on preference. This helps maintain balance during movement without putting too much pressure on any specific area of the body.
C. Use a Hydration System
An excellent alternative to traditional bottles is using a hydration system like CamelBak, which allows you to drink directly from an integrated reservoir via a hose connected mouthpiece without needing to stop walking or remove anything out of the pack first. These systems are especially useful if planning long hikes where frequent stops may not be possible due to their design allowing easy access fluids at all times.
D. Plan Your Water Stops Ahead of Time
- If possible, plan the route ahead knowing where reliable sources exist along the trail so you only need to carry enough until the next refill point, saving both space and weight within the pack.
- Carry a map or use GPS apps like AllTrails to locate water sources along your route.
- Be prepared with proper filtration equipment if planning on refilling from natural sources (see section 6 for more information).
E. Monitor Your Hydration Levels
Paying attention to the body’s signals of dehydration such as thirst, fatigue, dizziness, etc., can help ensure maintaining adequate fluid intake throughout the hike, preventing potential health issues arising due to lack thereof.
F. Don’t Overload Yourself with Water Weight
Carefully consider how much water you actually need during the hike based on factors such as distance, weather conditions, and personal hydration needs. Carrying too much unnecessary weight can lead to discomfort and exhaustion quicker than anticipated.
Incorporating these tips into your hiking routine will not only make carrying water easier but also enhance the overall enjoyment experience outdoors. Stay hydrated and happy trails.
Hydration is vital for a successful and pleasant hike, so it’s essential to be prepared with the correct equipment for transporting water. With this in view, let us now consider the optimal way to keep your water supply during a hike.
Key Points To Remember:
Learn how to carry water while hiking with ease and efficiency by choosing the right container, distributing weight evenly in your backpack, using a hydration system like CamelBak, planning your water stops ahead of time, monitoring your hydration levels and not overloading yourself with unnecessary weight. Incorporating these tips will enhance the overall enjoyable experience outdoors.
5. Best Practices for Storing Water While Hiking
Storing water while hiking is essential to ensure you have a constant supply of clean, fresh water throughout your adventure. Proper storage techniques can also help maintain the quality and temperature of your drinking water. In this section, we will explore some best practices for storing water while hiking.
Using Insulated Bottles or Bladders
Insulated bottles or bladders are an excellent choice for keeping your water cool during hot days on the trail. These containers are designed with double-wall construction and vacuum insulation technology that prevents heat transfer between the inner and outer walls, thus maintaining the desired temperature of your beverage.
- Bottle Material: Choose stainless steel insulated bottles as they are durable, BPA-free, and provide better insulation compared to plastic ones.
- Size: Opt for a bottle size that suits your hydration needs without adding too much weight to your backpack.
- Lid Type: Select a leak-proof lid design like screw-on caps or flip-top lids to prevent spills inside your bag.
Keeping Containers Out of Direct Sunlight
Sun exposure can not only warm up the contents but also cause damage to certain types of containers over time (e.g., plastic). To avoid these issues:
- Pack them in shaded areas within your backpack if possible,
- Cover them with a cloth or other insulating materials,
- Ensure that the external pockets on your backpack are oriented away from direct sunlight.
Securing Your Water Containers
It is essential to secure your water containers properly within or onto your backpack to prevent leaks and spills during your hike. Some tips for securing them include:
- Using designated pockets or compartments in your backpack specifically designed for holding bottles,
- Attaching carabiners or straps to keep them firmly in place,
- To ensure an even weight balance, heavier items should be placed at the bottom of your backpack and lighter ones on top.
Storing Backup Water Supplies
In case you run out of water while hiking, it’s always a good idea to have backup supplies stored separately from your primary source. This can be achieved by:
- Packing an extra collapsible bottle filled with water as a reserve,
- Filling up additional hydration bladders if using multiple reservoirs within one system.
By following these best practices, you can ensure that you stay hydrated throughout your entire trip. Whether you’re hiking a moderate trail or embarking on a long hike, carrying water is essential. Choose the best method for you, whether it’s hydration bladders, hydration packs, water bottles, or filtering water from natural sources. Stay hydrated and enjoy your adventure.
Ensuring you have enough clean drinking water is a vital component of any outdoor excursion, so make sure to plan accordingly. Now, let’s look at how to purify the accessible water sources when trekking.
Key Points To Remember:
When hiking, it’s important to store water properly to maintain its quality and temperature. Insulated bottles or bladders are ideal for keeping your drink cool, while containers should be kept out of direct sunlight and secured in designated pockets or with carabiners/straps. It’s also wise to have backup supplies stored separately from your primary source in case you run out of water during the hike.
Click to read about Best Sunset Hikes in Oahu for Breathtaking Views
6. How to Filter Water While Hiking
When trekking, having access to pure and safe drinking water is imperative for maintaining hydration and health. Filtering water while hiking can be an essential skill, especially when natural sources are your only option. In this section, we’ll explore the different varieties of filters available for hikers, how to utilize them correctly and offer advice on selecting the best one for your requirements.
A. Types of Water Filters
There are several types of water filters designed specifically for outdoor enthusiasts:
- Pump Filters: These require manual pumping action to force water through a filter cartridge that removes contaminants like bacteria and protozoa. Some popular pump filters include the Katadyn Hiker Pro and the MSR Guardian Purifier.
- Squeeze Filters: With these lightweight systems, you simply fill up a soft-sided bottle or pouch with untreated water and squeeze it through an attached filter element. The Sawyer Mini Filter is a popular choice among hikers.
- Gravity Filters: These work by using gravity to pull untreated water from a reservoir bag through a filter into another container or directly into your mouthpiece via tubing. Examples include the Platypus GravityWorks and the Katadyn Base Camp Pro 10L.
- Straw Filters: These compact filters allow you to drink directly from a water source by sucking through a straw-like device with an integrated filter. The popular LifeStraw Personal Water Filter is one such example.
- Ultraviolet (UV) Purifiers: UV purifiers like the SteriPEN Classic 3, use ultraviolet light to neutralize harmful microorganisms in water, making it safe to drink.
B. How to Use a Water Filter Effectively
To get the most out of your chosen water filter, follow these steps:
- Gather untreated water from a natural source like a stream or lake. Make sure it’s as clear as possible – if necessary, pre-filter using cloth or coffee filters before proceeding.
- Select your preferred filtration method based on convenience, speed, and effectiveness against specific contaminants present in your area.
- Familiarize yourself with the manufacturer’s instructions for proper usage and maintenance of your chosen filter system. This may include backflushing or cleaning procedures that help prolong its lifespan.
Toting a water filtration device when trekking is critical to keeping hydrated and secure on the path. By looking at alternatives to carrying water, you can lighten your load and make sure that you have enough energy for a successful hike.
Key Points To Remember:
Learn how to filter water while hiking, an essential skill for staying hydrated and healthy. Different types of filters are available including pump filters, squeeze filters, gravity filters, straw filters and ultraviolet purifiers like the SteriPEN Classic 3.
7. Alternatives to Carrying Water While Hiking

Hiking necessitates the need for water, but you can contemplate other ways of staying hydrated while trekking if you wish to reduce your load and have a more enjoyable experience. These alternatives can help lighten your load and make your hike more enjoyable. Let’s dive into some popular choices that adventurous hikers often consider.
A. Finding Natural Sources of Water
Nature provides us with numerous water sources, including streams, rivers, lakes and springs. When planning your hike route, look for trails that pass by these natural sources so you can refill along the way instead of carrying all the water you need from the start. Make sure to check local conditions before heading out because seasonal changes or droughts might affect their availability.
AllTrails is a great resource for finding hiking routes with nearby water sources; simply filter search results based on this criterion when looking up hikes in your area.
Note:
- Always treat any natural source of water before drinking it using a proper filtration system or purification tablets to avoid getting sick from harmful bacteria or parasites.
- If possible, collect flowing rather than stagnant water since it tends to be cleaner and fresher.
B. Using Hydration Packs with Built-in Reservoir Systems
An alternative method for carrying hydration during hikes involves using specialized backpacks called hydration packs which come equipped with built-in reservoir systems (also known as bladders). These packs allow hands-free access through a hose connected directly from the bladder inside the pack to an easily reachable mouthpiece near your shoulder strap— making sipping on the go easy.
The weight of the water is spread more evenly over your back with a hydration pack, decreasing tension on your shoulders and making it simpler to stay balanced while hiking. Popular brands include CamelBak, Osprey, and Platypus.
Keep in mind:
- Hydration packs come in various sizes, so choose one with a reservoir capacity suitable for the length of your hike.
- Cleaning hydration bladders can be tricky; make sure you follow proper cleaning instructions to prevent mold or bacteria growth inside them.
By considering these alternatives to carrying water while hiking, you’ll not only lighten up your load but also have an exciting adventure exploring nature’s wonders.
Key Points To Remember:
Hikers can explore alternative options for carrying water, such as finding natural sources of water along the trail or using hydration packs with built-in reservoir systems. When planning a hike, look for trails that pass by streams and rivers to refill your water supply. Hydration packs distribute weight evenly across your back and allow hands-free access through a hose connected directly from the bladder inside the pack to an easily reachable mouthpiece near your shoulder strap.
Click here to read about Discover the Best Hiking Jackets for Women
FAQs About Water While Hiking
What is the best way to carry water for hiking?
The best way to carry water while hiking depends on personal preference and hike duration. Some popular options include hydration packs, collapsible or rigid water bottles, and canteens. Hydration packs are convenient for hands-free drinking but may be heavier than other options. Collapsible bottles save space when empty, while rigid bottles offer durability.
How do hikers carry enough water?
Hikers can ensure they have enough water by calculating their needs based on factors like temperature, exertion level, and distance between reliable sources. They should also choose an appropriate container capacity and consider carrying multiple containers if needed. In addition, knowing how to filter or treat natural sources can help supplement carried supplies.
How do you collect water while hiking?
To collect water during a hike, locate a clean source such as streams or lakes using maps or apps like AllTrails. Use a portable filtration system (e.g., pump filters), chemical treatments (e.g., iodine tablets), or UV purifiers to remove contaminants before consumption. Always practice Leave No Trace principles when collecting from natural sources.
How can I carry water without a backpack?
If you prefer not carrying a backpack, there are alternative ways to transport your hydration gear: waist belts with built-in bottle holders; handheld carriers designed for easy grip; attaching carabiners/clips onto clothing loops; wearing vests specifically made for holding bottles in pockets close to the body (hydration vests). Choose what works best based on comfort and accessibility preferences.
Conclusion
Transporting H2O while trekking is key for sustaining hydration and well-being during your outdoor activities. When deciding on a water container for your hike, weigh up factors such as weight, durability, and ease of use. When picking a water vessel, take into account aspects such as heaviness, strength, and ease of utilization.
In addition to selecting the right container, it’s important to properly store and filter your water while hiking. By following best practices for carrying and filtering water on the trail, you can ensure that you stay safe and hydrated throughout your journey.
For your next hike or outdoor adventure, SunWaterDirt.com offers a wide range of quality hydration products to help you safely and efficiently transport water. With a wide selection of durable and reliable containers designed specifically for outdoor enthusiasts like you, they have everything you need to carry water in the best way possible.