Kayak Repair Made Easy – A Complete Guide
As a veteran kayaker, I’m thrilled to offer my expertise on how to repair damaged spots in composite kayaks. In this blog post, you will be guided through the process of recognizing and rectifying any common kayak repair issues that may arise with composite kayaks. We will discuss different types of damages such as oil canning and cracks that can occur.
You will also discover why duct tape is not a long-term solution for repairing your kayak and what steps you should take instead. Additionally, we’ll dive into the details of how to properly use a plastic welder to fix any damage on your kayak’s surface area effectively.
By following these kayak repair guidelines, you can extend the lifespan of your kayak and save money by avoiding costly repairs or replacements down the line. So let’s get started!
Table of Contents
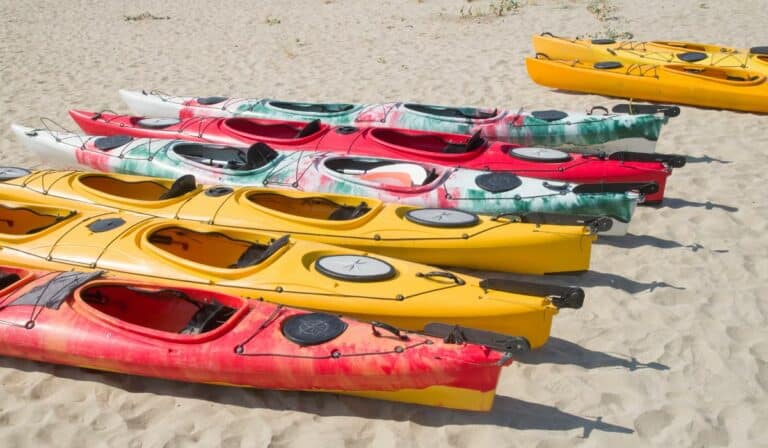
Identifying the Damage

It’s important to identify the damage on your kayak before attempting any kayak repair. Before commencing any repairs, it is prudent to accurately assess the type of damage to minimize cost and effort.
Evaluate the level of harm done to determine its magnitude. Look closely at where it occurred, whether it’s a hole or tear, and if there are any other signs of wear and tear around that area. If you see multiple areas with similar types of damage, then this could be an indication that something else may be causing them.
Next, determine how deep the damage goes into the hull material itself by feeling for soft spots or indentations along its surface with your fingertips. Use your digits to sense for tender patches or dents in the hull’s exterior, to figure out how much of it must be restored or swapped out for the kayak to stay solid when afloat.
You should also inspect all hardware attached to your kayak such as cleats, D-rings, handles, etc., looking for cracks or corrosion which could weaken their strength over time and cause further issues down the line if left unchecked now.
Finally, take note of any scratches or scrapes across its exterior too; these might not necessarily require immediate attention but they still need addressing eventually so make sure they’re noted somewhere safe so you don’t forget about them later.
Using these steps can help ensure that all necessary are made properly and efficiently when doing your own kayak repair, giving your kayak the longest life possible.
Assessing the impairment is a fundamental part of any kayak repair, as it assists in recognizing what materials and instruments are required to complete the job. With that knowledge in hand, it’s time to gather supplies for your repair project.
The Key Takeaway: It’s important to thoroughly inspect your kayak for any damage before attempting repairs; feel the hull surface, check all hardware, and note down any scratches or scrapes. With these steps in mind, you can get your damaged kayak shipshape again in no time.
Gather Supplies

Gathering the necessary supplies for a kayak repair is essential. You don’t want to be halfway through the job and realize you need something else. Before commencing, ensure you have all the required materials available:
- Patching material – This can come in many forms, including self-adhesive patches, epoxy putty or fiberglass cloth, and resin. The type of patching material will depend on the size and location of the damage as well as your skill level with repairs.
- Sandpaper – A medium-grit sandpaper will work best for most kayak repairs; it should be strong enough to remove any dirt or debris from the area but not so rough that it damages your boat further.
- Primer – Use a marine primer specifically designed for boats before applying patching materials; this helps ensure adhesion and water resistance after drying time has elapsed.
- Plastic spreaders – These are used to apply even pressure when smoothing out patches during application; they also help prevent air bubbles from forming beneath the patch which could weaken its bond over time due to moisture seeping in around them.
- Solvent cleaner – A solvent cleaner such as acetone is important for cleaning off any oils or waxes left behind by previous applications of sealant or paint; this helps ensure proper adhesion when applying new patches later on down the line.
Having all these supplies handy will save you time, money, and frustration while ensuring your repair job is done correctly.
Gathering the right supplies is key to a successful kayak repair. With all of the necessary items in hand, you can now move on to preparing your kayak for repairs.
Don’t start a kayak repair without the right supplies. Get primed with patching material, sandpaper, plastic spreaders and solvent cleaner for a successful job.
Preparing the Kayak

Cleaning and sanding are essential steps in preparing your kayak for repair. Before any repair work begins, ensure the kayak’s surface is free of dirt or debris that could impede progress by wiping it down with a damp cloth. Give the kayak’s surface a thorough cleaning with a damp cloth to eliminate any stray debris.
Using an orbital sander, lightly sand the kayak’s surface to remove any dirt or grime and ensure a smooth finish before commencing repairs; move in one direction while doing so to avoid scratches. Make sure to move in one direction when sanding so as not to create scratches on the hull or deck of your boat. Use a finer grit paper if necessary until you have achieved a smooth finish on all surfaces before beginning repairs.
For optimal protection, donning eye protection and gloves is essential when sanding the kayak with an orbital sander. Also, keep an eye out for splinters or cracks in the wood which can indicate further damage that needs attention before continuing with repairs.
Once you’ve finished sanding, vacuum up any dust left behind then wipe down again with a damp cloth and allow time for it to dry completely before starting repairs such as fiberglass patchwork or filling holes caused by rot or weather damage. This step will ensure that no moisture remains trapped underneath which could cause further problems later on once repaired areas are exposed back to water conditions outdoors during recreation activities like kayak fishing trips or kayak camping excursions.
It is important to ensure that the kayak is properly prepared for repair before beginning any work. Time to progress and discover the technique for remedying the harm caused.
The Key Takeaway: Before any maintenance, make sure the kayak is pristine and free of rubbish. Sand away dirt or grime with an orbital sander while wearing safety glasses and protective gloves; then vacuum up any dust left behind before drying completely and starting repairs such as patchwork or filling holes. Keep your vessel shipshape so you can hit the high seas in no time.
Repairing the Damage

Patch Holes:
Patching holes in your kayak is an important step in repairing the damage. To patch a hole, you’ll need a flexible vinyl patch kit, which includes adhesive and patches of various sizes. Clean the area around the hole with a mild cleaning agent, such as rubbing alcohol or soap and water, to ensure no debris remains. Cut a patch larger than the hole and affix it firmly to the surface, applying adhesive on both sides and using a roller or squeegee for pressing. Apply an adhesive to both the patch and the surface, then press it down using a roller or squeegee to ensure no air pockets are present. Allow 24 hours for drying before testing out your kayak repair job.
Fill Cracks:
When filling cracks on your kayak, start by using sandpaper to smooth out any rough edges around them first. Then mix up some marine-grade epoxy according to package instructions and apply it liberally into each crack using a putty knife or other tool until all gaps are filled. Once dry (which can take several days), use fine-grit sandpaper again to smooth out any excess epoxy for a neat finish.
The Key Takeaway: To repair a kayak, patch holes with adhesive and vinyl patches that are slightly larger than the hole. Fill cracks using marine-grade epoxy mixed according to package instructions, then use sandpaper for neat finishing touches. It’s as easy as pie.
FAQs about Kayak Repair
How to repair a kayak?
Kayak repair requires careful attention to detail and some basic knowledge of the materials used in its construction. Start by inspecting the hull for any cracks or tears, then use sandpaper to smooth out any rough edges.
If necessary, use fiberglass resin and cloth to patch up holes or cracks. Once done, spread an epoxy layer over the entirety of your kayak for extra protection against water harm. Finally, reattach all fittings such as seat straps and foot pegs before taking it back on the water.
Can you repair a crack in a kayak?
It may be feasible to mend a split in a kayak, yet the achievement of such mending is contingent on the magnitude and position of the fracture.
Epoxy or polyester resin can be utilized to patch up any minor splits, followed by sanding for a glossy conclusion. However, if the damage is more extensive or located near an area with high-stress points (such as around rivets), it may be necessary to replace parts of your kayak instead. For a more informed decision, it is advisable to seek expert advice.
What is the lifespan of a kayak?
The durability of a kayak is contingent on various components, such as the quality and kind of materials used in its fabrication, how often it’s maintained correctly, plus the attention taken while operating. Generally, a kayak of good quality should have a lifespan ranging from 10 to 15 years with suitable upkeep.
This includes storing them out of direct sunlight and away from extreme temperatures; regularly cleaning them with fresh water after use; avoiding dragging or dropping them; inspecting all hardware frequently for wear or damage; replacing worn parts promptly; and following manufacturer’s instructions regarding maintenance requirements.
What plastic is best for kayak repair?
Polyethylene plastic is the best choice for kayak repair. It is a strong, lightweight material that resists corrosion and has excellent impact resistance. Its flexibility allows it to be easily shaped into complex parts while its low melting point makes it ideal for welding repairs.
Polyethylene also stands up well against UV exposure, making it an excellent option for outdoor use. With proper maintenance, polyethylene can last many years in even the harshest conditions without needing replacement or major repairs.
Conclusion
After completing the repairs, you should now have a safe and functional kayak. Kayak repair can be a tricky process but with some patience and attention to detail, it is possible to fix even serious damage. Regularly inspect your kayak for any potential problems that may come up, so you can take care of them swiftly and avoid them from escalating.